OneFS File Filtering

OneFS file filtering enables a cluster administrator to either allow or deny access to files based on their file extensions. This allows the immediate blocking of certain types of files that might cause security issues, content licensing violations, throughput or productivity disruptions, or general storage bloat. For example, the ability to universally block an executable file extension such as ‘.exe’ after discovery of a software vulnerability is undeniably valuable.

File filtering in OneFS is multi-protocol, with support for SMB, NFS, HDFS and S3 at a per-access zone granularity. It also includes default share and per share level configuration for SMB, and specified file extensions can be instantly added or removed if the restriction policy changes.

Within OneFS, file filtering has two basic modes of operation:

  • Allow file writes
  • Deny file writes

In allow rights mode, an inclusion list specifies the file types by extension which can be written. In this example, OneFS only permits mp4 files, blocking all other file types.

# isi file-filter settings modify --file-filter-type allow

--file-filter-extensions .mp4

# isi file-filter settings view

               Enabled: Yes

File Filter Extensions: mp4

      File Filter Type: allow

In contrast, with deny writes configured, an exclusion list specifies file types by extension which are denied from being written. OneFS permits all other file types to be written.

# isi file-filter settings modify --file-filter-type deny --file-filter-extensions .txt

# isi file-filter settings view

               Enabled: Yes

File Filter Extensions: txt

      File Filter Type: deny

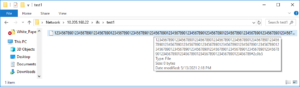
For example, with the configuration above, OneFS denies all other file types than ‘.txt’ from being written to the share, as shown in the following Windows client CMD shell output.

 Note that preexisting files with filtered extensions on the cluster are still be able to read or deleted, but not appended.

Additionally, file filtering can also be configured when creating or modifying a share via the ‘isi smb shares create’ or ‘isi smb shares modify’ commands.

For example, the following CLI syntax enables file filtering on a share named ‘prodA’ and denies writing ‘.wav’ and ‘.mp3’ file types:

# isi smb shares create prodA /ifs/test/proda --file-filtering-enabled=yes --file-filter-extensions=.wav,.mp3

Similarly, to enable file filtering on a share named ‘prodB’ and allow writing only ‘.xml’ files:

# isi smb shares modify prodB --file-filtering-enabled=yes --file-filter-extensions=xml --file-filter-type=allow

Note that if a preceding ‘.’ (dot character) is omitted from a ‘–file-filter-extensions’ argument, the dot will automatically be added as a prefix to any file filter extension specified. Also, up to 254 characters can be used to specify a file filter extension.

Be aware that characters such as ‘*’ and ‘?’ are not recognized as ‘wildcard’ characters in OneFS file filtering and cannot be used to match multiple extensions. For example, the file filter extension ‘mp*’ will match the file f1.mp*, but not f1.mp3 or f1.mp4, etc.

A previous set of file extensions can be easily removed from the filtering configuration as follows:

# isi file-filter settings modify --clear-file-filter-extensions

File filtering can also be configured to allow or deny file writes based on file type at a per-access zone level, limiting filtering rules exclusively to files in the specified zone. OneFS does not take into consideration which file sharing protocol was used to connect to the access zone when applying file filtering rules. However, additional file filtering can be applied at the SMB share level.

The ‘isi file-filter settings modify’ command can be used to enable file filtering per access zone and specify which file types users are denied or allowed write access. For example, the following CLI syntax enables file filtering in the ‘az3’ zone and only allows users to write html and xml file types:

# isi file-filter settings modify --zone=az3 --enabled=yes --file-filter-type=allow --file-filter-extensions=.xml,.html

Similarly, the following command prevents writing pdf, txt, and word files in zone ‘az3’:

# isi file-filter settings modify --zone=az3 --enabled=yes --file-filter-type=deny --file-filter-extensions=.doc,.pdf,.txt

The file filtering settings in an access zone can be confirmed by running the ‘isi file-filter settings view’ command. For example, the following syntax displays file filtering config in the az3 access zone:

# isi file-filter settings view --zone=az3

               Enabled: Yes

File Filter Extensions: doc, pdf, txt

      File Filter Type: deny

For security post-mortem and audit purposes, file filtering events are written to /var/log/lwiod.log at the ‘verbose’ log level. The following CLI commands can be used to configure the lwiod.log level:

# isi smb log-level view

Current logging level: 'info'

# isi smb log-level modify verbose

# isi smb log-level view

Current logging level: 'verbose'

For example, the following entry is logged when unsuccessfully attempting to create file /ifs/test/f1.txt from a Windows client with ‘txt’ file filtering enabled:

# grep -i "f1.txt" /var/log/lwiod.log

2021-12-15T19:34:04.181592+00:00 <30.7> isln1(id8) lwio[6247]: Operation blocked by file filtering for test\f1.txt

After enabling file filtering, you can confirm that the filter drivers are running via the following command:

# /usr/likewise/bin/lwsm list * | grep -i 'file_filter'

flt_file_filter            [filter]      running (lwio: 6247)

flt_file_filter_hdfs       [filter]      running (hdfs: 35815)

flt_file_filter_lwswift    [filter]      running (lwswift: 6349)

flt_file_filter_nfs        [filter]      running (nfs: 6350)

When disabling file filtering, previous settings that specify filter type and file type extensions are preserved but no longer applied. For example, the following command disables file filtering in the az3 access zone but retains the type and extensions configuration:

# isi file-filter settings modify --zone=az3 --enabled=no

# isi file-filter settings view

               Enabled: No

File Filter Extensions: html, xml

      File Filter Type: deny

When disabled, the filter drivers will no longer be running:

# /usr/likewise/bin/lwsm list * | grep -i 'file_filter'

flt_file_filter            [filter]      stopped

flt_file_filter_hdfs       [filter]      stopped

flt_file_filter_lwswift    [filter]      stopped

flt_file_filter_nfs        [filter]      stopped

OneFS and Long Filenames

Another feature debut in OneFS 9.3 is support for long filenames. Until now, the OneFS filename limit has been capped 255 bytes. However, depending on the encoding type, this could potentially be an impediment for certain languages such as Chinese, Hebrew, Japanese, Korean, and Thai, and can create issues for customers who work with international languages that use multi-byte UTF-8 characters.

Since some international languages use up to 4 bytes per character, a file name of 255 bytes could be limited to as few as 63 characters when using certain languages on a cluster.

To address this, the new long filenames feature provides support for names up to 255 Unicode characters, by increasing the maximum file name length from 255 bytes to 1024 bytes. In conjunction with this, the OneFS maximum path length is also increased from 1024 bytes to 4096 bytes.

Before creating a name length configuration, the cluster must be running OneFS 9.3. However, the long filename feature is not activated or enabled by default. You have to opt-in by creating a “name length” configuration. That said, the recommendation is to only enable long filename support if you are actually planning on using it.  This is because, once enabled, OneFS does not track if, when, or where, a long file name or path is created.

The following procedure can be used to configure a PowerScale cluster for long filename support:

Step 1:  Ensure cluster is running OneFS 9.3 or later.

The ‘uname’ CLI command output will display a cluster’s current OneFS version.

For example:

# uname -sr

Isilon OneFS v9.3.0.0

The current OneFS version information is also displayed at the upper right of any of the OneFS WebUI pages. If the output from step 1 shows the cluster running an earlier release, an upgrade to OneFS 9.3 will be required. This can be accomplished either using the ‘isi upgrade cluster’ CLI command or from the OneFS WebUI, by going to Cluster Management > upgrade.

Once the upgrade has completed it will need to be committed, either by following the WebUI prompts, or using the ‘isi upgrade cluster commit’ CLI command.

Step 2.  Verify Cluster’s Long Filename Support Configuration

  1. Viewing a Cluster’s Long Filename Support Settings

The ‘isi namelength list’ CLI command output will verify a cluster’s long filename support status. For example, the following cluster already has long filename support enabled on the /ifs/tst path:

# isi namelength list

Path     Policy     Max Bytes  Max Chars

-----------------------------------------

/ifs/tst restricted 255        255

-----------------------------------------

Total: 1

Step 3.  Configure Long Filename Support

The ‘isi namelength create <path>’ CLI command can be run on the cluster to enable long filename support.

# mkdir /ifs/lfn

# isi namelength create --max-bytes 1024 --max-chars 1024 /ifs/lfn

By default, namelength support is created with default maximum values of 255 Bytes in length and 255 characters.

Step 4:  Confirm Long Filename Support is Configured

The ‘isi namelength list’ CLI command output will confirm that the cluster’s /ifs/lfn directory path is now configured to support long filenames:

# isi namelength list

Path     Policy     Max Bytes  Max Chars

-----------------------------------------

/ifs/lfn custom     1024       1024

/ifs/tst restricted 255        255

-----------------------------------------

Total: 2

Name length configuration is setup per directory and can be nested. Plus, cluster-wide configuration can be applied by configuring at the root /ifs level.

Filename length configurations have two defaults:

  • “Full” – which is 1024 bytes, 255 characters.
  • “Restricted” – which is 255 bytes, 255 characters, and the default if no long additional filename configuration is specified.

Note that removing the long name configuration for a directory will not affect its contents, including any previously created files and directories with long names. However, it will prevent any new long-named files or subdirectories from being created under that directory.

If a filename is too long for a particular protocol, OneFS will automatically truncate the name to around 249 bytes with a ‘hash’ appended to it, which can be used to consistently identify and access the file. This shortening process is referred to as ‘name mangling’. If, for example, a filename longer than 255 bytes is returned in a directory listing over NFSv3, the file’s mangled name will be presented. Any subsequent lookups of this mangled name will resolve to the same file with the original long name. Be aware that filename extensions will be lost when a name is mangled, which can have ramifications for Windows applications, etc.

If long filename support is enabled on a cluster with active SyncIQ policies, all source and target clusters must have OneFS 9.3 or later installed and committed, and long filename support enabled.

However, the long name configuration does not need to be identical between the source and target clusters; it only needs to be enabled. This can be done via the following sysctl:

# sysctl efs.bam.long_file_name_enabled=1

When the target cluster for a Sync policy does not support long file names for a SyncIQ policy and the source domain has long file names enabled, the replication job will fail. The subsequent SyncIQ job report will include the following error message:

Note that the OneFS checks are unable to identify a cascaded replication target running an earlier OneFS version and/or without long filenames configured.

So there are a couple of things to bear in mind when using long filenames:

  • Restoring data from a 9.3 NDMP backup containing long filenames to a cluster running an earlier OneFS version will fail with an ‘ENAMETOOLONG’ error for each long-named file. However, all the files with regular length names will be successfully restored from the backup stream.
  • OneFS ICAP does not support long filenames. However CAVA, ICAP’s replacement, is compatible.
  • The ‘isi_vol_copy’ migration utility does not support long filenames.
  • Neither does the OneFS WebDAV protocol implementation.
  • Symbolic links created via SMB are limited to 1024 bytes due to the size limit on extended attributes.
  • Any pathnames specified in long filename pAPI operations are limited to 4068 bytes.
  • And finally, while an increase in long named files and directories could potentially reduce the number of names the OneFS metadata structures can hold, the overall performance impact of creating files with longer names is negligible.

PowerScale P100 & B100 Accelerators

In addition to a variety of software features, OneFS 9.3 also introduces support for two new PowerScale accelerator nodes. Based on the 1RU Dell PE R640 platform, these include the:

  • PowerScale P100 performance accelerator
  • PowerScale B100 backup accelerator.

Other than a pair of low capacity SSD boot drives, neither the B100 or P100 nodes contain any local storage or journal. Both accelerators are fully compatible with clusters containing the current PowerScale and Gen6+ nodes, plus the previous generation of Isilon Gen5 platforms. Also, unlike storage nodes which require the addition of a 3 or 4 node pool of similar nodes, a single P100 or B100 can be added to a cluster.

The P100 accelerator nodes can simply, and cost effectively, augment the CPU, RAM, and bandwidth of a network or compute-bound cluster without significantly increasing its capacity or footprint.

Since the accelerator nodes contain no storage and a sizable RAM footprint, they have a substantial L1 cache, since all the data is fetched from other storage nodes. Cache aging is based on a least recently used (LRU) eviction policy and the P100 is available in two memory configurations, with either 384GB or 768GB of DRAM per node. The P100 also supports both inline compression and deduplication.

In particular, the P100 accelerator can provide significant benefit to serialized, read-heavy, streaming workloads by virtue of its substantial, low-churn L1 cache, helping to increase throughput and reduce latency. For example, a typical scenario for P100 addition could be a small all-flash cluster supporting a video editing workflow that is looking for a performance and/or front-end connectivity enhancement, but no additional capacity.

On the backup side, the PowerScale B100 contains a pair of 16Gb fibre channel ports, enabling direct or two-way NDMP backup from a cluster directly to tape or VTL, or across an FC fabric.

The B100 backup accelerator integrates seamlessly with current DR infrastructure, as well as with leading data backup and recovery software technologies to satisfy the availability and recovery SLA requirements of a wide variety of workloads. The B100 can be added to a cluster containing  current and prior generation all-flash, hybrid, and archive nodes.

The B100 aids overall cluster performance by offloading NDMP backup traffic directly to the FC ports and reducing CPU and memory consumption on storage nodes, thereby minimizing impact on front end workloads. This can be of particular benefit to clusters that have been using gen-6 nodes populated with FC cards. In these cases, a simple, non-disruptive addition of B100 node(s) will free up compute resources on the storage nodes, both improving client workload performance and shrinking NDMP backup windows.

Finally, the hardware specs for the new PowerScale P100 and B100 accelerator platforms are as follows:

Component (per node) P100 B100
OneFS release 9.3 or later 9.3 or later
Chassis PowerEdge R640 PowerEdge R640
CPU 20 cores (dual socket @ 2.4Ghz) 20 (dual socket @ 2.4Ghz)
Memory 384GB or 768GB 384GB
Front-end I/O Dual port 10/25 Gb Ethernet

Or

Dual port 40/100Gb Ethernet

Dual port 10/25 Gb Ethernet

Or

Dual port 40/100Gb Ethernet

Back-end I/O Dual port 10/25 Gb Ethernet

Or

Dual port 40/100Gb Ethernet

Or

Dual port QDR Infiniband

Dual port 10/25 Gb Ethernet

Or

Dual port 40/100Gb Ethernet

Or

Dual port QDR Infiniband

Journal N/A N/A
Data Reduction Support Inline compression and dedupe Inline compression and dedupe
Power Supply Dual redundant 750W 100-240V, 50/60Hz Dual redundant 750W 100-240V, 50/60Hz
Rack footprint 1RU 1RU
Cluster addition Minimum one node, and single node increments Minimum one node, and single node increments

Note: Unlike PowerScale storage nodes, since these accelerators do not provide any storage capacity, the PowerScale P100 and B100 nodes do not require OneFS feature licenses for any of the various data services running in a cluster.

OneFS S3 Protocol Enhancements

The new OneFS 9.3 sees some useful features added to its S3 object protocol stack, including:

  • Chunked Upload
  • Delete Multiple Objects support
  • Non-slash delimiter support for ListObjects/ListObjectsV2

When uploading data to OneFS via S3, there are two types of uploading options for authenticating requests using the S3 Authorization header:

  • Transfer payload in a single chunk
  • Transfer payload in multiple chunks (chunked upload)

Applications that typically use the chunked upload option by default include Restic, Flink, Datadobi, and the AWS S3 Java SDK. The new 9.3 release enables these and other applications to work seamlessly with OneFS.

Chunked upload, as the name suggests, facilitates breaking data payload into smaller units, or chunks for more efficient upload. These can be fixed or variable-size, and chunking aids performance by avoiding reading the entire payload in order to calculate the signature. Instead, for the first chunk, a seed signature is calculated which uses only the request headers. The second chunk contains the signature for the first chunk, and each subsequent chunk contains the signature for the preceding one. At the end of the upload, a zero byte chunk is transmitted which contains the last chunk’s signature. This protocol feature is described in more detail in the AWS S3 Chunked Upload documentation.

The AWS S3 DeleteObjects API enables the deletion of multiple objects from a bucket using a single HTTP request. If you know the object keys that you wish to delete, the DeleteObjects API provides an efficient alternative to sending individual delete requests, reducing per-request overhead.

For example, the following python code can be used to delete the three objects file1, file2, and file3 from bkt01 in a single operation:

import boto3


# set HOST IP, user access id and secret key

HOST='192.168.198.10'  # Your SmartConnect name or cluster IP goes here

USERNAME='1_s3test_accid'  # Your access ID

USERKEY='WttVbuRv60AXHiVzcYn3b8yZBtKc'   # Your secret key

URL = 'http://{}:9020'.format(HOST)


s3 = boto3.resource('s3')

session = boto3.Session()


s3client = session.client(service_name='s3',aws_access_key_id=USERNAME,aws_secret_access_key=USERKEY,endpoint_url=URL,use_ssl=False,verify=False)


bkt_name='bkt01'

response=s3client.delete_objects(

Bucket='bkt01',

Delete={

'Objects': [

{

'Key': 'file1'

},

{

'Key': 'file2'

},

{

'Key': 'file3'

}

]

}

)

print(response)

Note that Boto3, the AWS S3 SDK for python, is used in the code above. Boto3 can be downloaded here and installed on a Linux client via pip (ie. # pip install boto3).

Another S3 feature that’s added in OneFS 9.3 is non-slash delimiter support. The AWS S3 data model is a flat structure with no physical hierarchy of directories or folders: A bucket is created, under which objects are stored. However, AWS S3 does make provision for a logical hierarchy using object key name prefixes and delimiters to support a rudimentary concept of folders, as described in Amazon S3 Delimiter and Prefix. In prior OneFS releases, only a slash (‘/’) was supported as a delimiter. However, the new OneFS 9.3 release now expands support to include non-slash delimiters for listing objects in buckets. Also, the new delimiter can comprise multiple characters.

To illustrate this, take the keys “a/b/c”, “a/bc/e” , abc”:

  • If the delimiter is “b” with no prefix, “a/b” and “ab” are returned as the common prefix.
  • With delimiter “b” and prefix “a/b”, “a/b/c” and “a/bc/e” will be returned.

The delimiter can also have either ‘no slash’ or ‘slash’ at the end. For example, “abc”, “/”, “xyz/” are all supported. However, “a/b”, “/abc”, “//” are invalid.

In the following example, three objects (file1, file2, and file3) are uploaded from a Linux client to a cluster via the OneFS S3 protocol with object keys, and stored under the following topology:

# tree bkt1

bkt1

├── dir1
│   ├── file2
│   └── sub-dir1
│       └── file3
└── file1

2 directories, 3 files

These objects can be listed using ‘sub’ as the delimiter value by running the following python code:

import boto3

# set HOST IP, user access id and secret key

HOST='192.168.198.10'  # Your SmartConnect name or cluster IP goes here

USERNAME='1_s3test_accid'  # Your access ID

USERKEY=' WttVbuRv60AXHiVzcYn3b8yZBtKc'   # Your secret key

URL = 'http://{}:9020'.format(HOST)  


s3 = boto3.resource('s3')

session = boto3.Session()


s3client = session.client(service_name='s3',aws_access_key_id=USERNAME,aws_secret_access_key=USERKEY,endpoint_url=URL,use_ssl=False,verify=False)


bkt_name='bkt1'

response=s3client.list_objects(

    Bucket=bkt_name,

    Delimiter='sub'

)

print(response)

The keys ‘file1’ and ‘dir1/file2’ are returned in the , and ‘dir1/sub’ is returned as a common prefix.

{'ResponseMetadata': {'RequestId': '564950507', 'HostId': '', 'HTTPStatusCode': 200, 'HTTPHeaders': {'connection': 'keep-alive', 'x-amz-request-id': '564950507', 'content-length': '796'}, 'RetryAttempts': 0}, 'IsTruncated': False, 'Marker': '', 'Contents': [{'Key': 'dir1/file2', 'LastModified': datetime.datetime(2021, 11, 24, 16, 15, 6, tzinfo=tzutc()), 'ETag': '"d41d8cd98f00b204e9800998ecf8427e"', 'Size': 0, 'StorageClass': 'STANDARD', 'Owner': {'DisplayName': 's3test', 'ID': 's3test'}}, {'Key': 'file1', 'LastModified': datetime.datetime(2021, 11, 24, 16, 10, 43, tzinfo=tzutc()), 'ETag': '"d41d8cd98f00b204e9800998ecf8427e"', 'Size': 0, 'StorageClass': 'STANDARD', 'Owner': {'DisplayName': 's3test', 'ID': 's3test'}}], 'Name': 'bkt1', 'Prefix': '', 'Delimiter': 'sub', 'MaxKeys': 1000, 'CommonPrefixes': [{'Prefix': 'dir1/sub'}]}

OneFS 9.3 also delivers significant improvements to the S3 multi-part upload functionality. In prior OneFS versions, each constituent piece of an upload was written to a separate file, and all the parts concatenated on a completion request. As such, the concatenation process could take a significant duration for large file.

With the new OneFS 9.3 release, multi-part upload instead writes data directly into a single file, so completion is near-instant. The multiple parts are consecutively numbered, and all have same size except for the final one. Since no re-upload or concatenation is required, the process is both lower overhead as well as significantly quicker.

OneFS 9.3 also includes improved handling of inter-level directories. For example, if ‘a/b’ is put on a cluster via S3, the directory ‘a’ is created implicitly. In previous releases, if ‘b’ was then deleted, the directory ‘a’ remained and was treated as an object. However, with OneFS 9.3, the directory is still created and left, but is now identified as an inter-level directory. As such, it is not shown as an object via either ‘Get Bucket’ or ‘Get Object’. With 9.3, an S3 client can now remove a bucket if it only has inter-level directories. In prior releases, this would have failed with a ‘bucket not empty’ error. However, the multi-protocol behavior is unchanged, so a directory created via another OneFS protocol, such as NFS, is still treated as an object. Similarly, if an inter-level directory was created on a cluster prior to a OneFS 9.3 upgrade, that directory will continue to be treated as an object.

OneFS Virtual Hot Spare

There have been a several recent questions from the field around how a cluster manages space reservation and pre-allocation of capacity for data repair and drive rebuilds.

OneFS provides a mechanism called Virtual Hot Spare (VHS), which helps ensure that node pools maintain enough free space to successfully re-protect data in the event of drive failure.

Although globally configured, Virtual Hot Spare actually operates at the node pool level so that nodes with different size drives reserve the appropriate VHS space. This helps ensure that, while data may move from one disk pool to another during repair, it remains on the same class of storage. VHS reservations are cluster wide and configurable as either a percentage of total storage (0-20%) or as a number of virtual drives (1-4). To achieve this, the reservation mechanism allocates a fraction of the node pool’s VHS space in each of its constituent disk pools.

No space is reserved for VHS on SSDs unless the entire node pool consists of SSDs. This means that a failed SSD may have data moved to HDDs during repair, but without adding additional configuration settings. This avoids reserving an unreasonable percentage of the SSD space in a node pool.

The default for new clusters is for Virtual Hot Spare to have both “subtract the space reserved for the virtual hot spare…” and “deny new data writes…” enabled with one virtual drive. On upgrade, existing settings are maintained.

It is strongly encouraged to keep Virtual Hot Spare enabled on a cluster, and a best practice is to configure 10% of total storage for VHS. If VHS is disabled and you upgrade OneFS, VHS will remain disabled. If VHS is disabled on your cluster, first check to ensure the cluster has sufficient free space to safely enable VHS, and then enable it.

VHS can be configured via the OneFS WebUI, and is always available, regardless of whether SmartPools has been licensed on a cluster. For example:

From the CLI, the cluster’s VHS configuration are part of the storage pool settings, and can be viewed with the following syntax:

# isi storagepool settings view

     Automatically Manage Protection: files_at_default

Automatically Manage Io Optimization: files_at_default

Protect Directories One Level Higher: Yes

       Global Namespace Acceleration: disabled

       Virtual Hot Spare Deny Writes: Yes

        Virtual Hot Spare Hide Spare: Yes

      Virtual Hot Spare Limit Drives: 1

     Virtual Hot Spare Limit Percent: 10

             Global Spillover Target: anywhere

                   Spillover Enabled: Yes

        SSD L3 Cache Default Enabled: Yes

                     SSD Qab Mirrors: one

            SSD System Btree Mirrors: one

            SSD System Delta Mirrors: one

Similarly, the following command will set the cluster’s VHS space reservation to 10%.

# isi storagepool settings modify --virtual-hot-spare-limit-percent 10

Bear in mind that reservations for virtual hot sparing will affect spillover. For example, if VHS is configured to reserve 10% of a pool’s capacity, spillover will occur at 90% full.

The VHS percentage parameter is governed by the following sysctl:

# sysctl efs.bam.disk_pool_min_vhs_pct

efs.bam.disk_pool_min_vhs_pct: 10

There’s also a related sysctl that constrains the upper VHS bounds to a maximum of 50% by default:

# sysctl efs.bam.disk_pool_max_vhs_pct

efs.bam.disk_pool_max_vhs_pct: 50

Spillover allows data that is being sent to a full pool to be diverted to an alternate pool. Spillover is enabled by default on clusters that have more than one pool. If you have a SmartPools license on the cluster, you can disable Spillover. However, it is recommended that you keep Spillover enabled. If a pool is full and Spillover is disabled, you might get a “no space available” error but still have a large amount of space left on the cluster.

If the cluster is inadvertently configured to allow data writes to the reserved VHS space, the following informational warning will be displayed in the SmartPools WebUI:

There is also no requirement for reserved space for snapshots in OneFS. Snapshots can use as much or little of the available file system space as desirable and necessary.

A snapshot reserve can be configured if preferred, although this will be an accounting reservation rather than a hard limit and is not a recommend best practice. If desired, snapshot reserve can be set via the OneFS command line interface (CLI) by running the ‘isi snapshot settings modify –reserve’ command.

For example, the following command will set the snapshot reserve to 10%:

# isi snapshot settings modify --reserve 10

It’s worth noting that the snapshot reserve does not constrain the amount of space that snapshots can use on the cluster. Snapshots can consume a greater percentage of storage capacity specified by the snapshot reserve.

Additionally, when using SmartPools, snapshots can be stored on a different node pool or tier than the one the original data resides on.

For example, as above, the snapshots taken on a performance aligned tier can be physically housed on a more cost effective archive tier.