OneFS NFS Netgroups

A OneFS network group, or netgroup, defines a network-wide group of hosts and users. As such, they can be used to restrict access to shared NFS filesystems, etc. Network groups are stored in a network information services, such as LDAP, NIS, or NIS+, rather than in a local file. Netgroups help to simplify the identification and management of people and machines for access control.

The isi_netgroup_d service provides netgroup lookups and caching for consumers of the ‘isi_nfs’ library.  Only mountd and the ‘isi nfs’ command-line interface use this service.  The isi_netgroup_d daemon maintains a fast, persistent cluster-coherent cache containing netgroups and netgroup members.  isi_netgroup_d enforces netgroup TTLs and netgroup retries.  A persistent cache database (SQLite) exists to store and recover cache data across reboots.  Communication with isi_netgroup_d is via RPC and it will register its service and port with the local rpcbind.

Within OneFS, the netgroup cache possesses the following gconfig configuration parameters:

# isi_gconfig -t nfs-config | grep cache

shared_config.bypass_netgroup_cache_daemon (bool) = false

netcache_config.nc_ng_expiration (uint32) = 3600000

netcache_config.nc_ng_lifetime (uint32) = 604800

netcache_config.nc_ng_retry_wait (uint32) = 30000

netcache_config.ncdb_busy_timeout (uint32) = 900000

netcache_config.ncdb_write (uint32) = 43200000

netcache_config.nc_max_hosts (uint32) = 200000

Similarly, the following files are used by the isi_netgroup_d daemon:
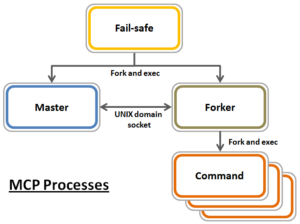
File Purpose
     /var/run/isi_netgroup_d.pid The pid of the currently running isi_netgroup_d
     /ifs/.ifs/modules/nfs/nfs_config.gc Server configuration file
     /ifs/.ifs/modules/nfs/netcache.db Persistent cache database
     /var/log/isi_netgroup_d.log Log output file

In general, using IP addresses works better than hostnames for netgroups. This is because hostnames require a DNS lookup and resolution from FQDN to IP address. Using IP addresses directly saves this overhead.

Resolving a large set of hosts in the allow/deny list is significantly faster when using netgroups. Entering a large host list in the NFS export means OneFS has to look up the hosts for each individual NFS export. In Netgroups, once looked up, it is cached by netgroups, so it doesn’t have to be looked up again if there are overlap between exports. It is also better to use an LDAP (or NIS) server when using Netgroups instead of the flat file. If you have a large list of hosts in the netgroups file, it can take a while to resolve as it is single threaded and sequential. LDAP/NIS provider based netgroups lookup is parallelized.

The OneFS netgroup cache has a default limit in gconfig of 200,000 host entries.

# isi_gconfig -t nfs-config | grep max

netcache_config.nc_max_hosts (uint32) = 200000

So what is the waiting period between when /etc/netgroup is updated to when the NFS export realizes the change? OneFS uses a netgroup cache and both its expiration and lifetime are both tunable. The netgroup expiration and lifetime can be configured with this following CLI command:

# isi nfs netgroup modify

--expiration or -e <duration>

Set the netgroup expiration time.

--lifetime or -l <duration>

Set the netgroup lifetime.

OneFS also provides the ‘isi nfs netgroups flush’ CLI command, which can be used to force a reload of the file.

# isi nfs netgroup flush

        [--host <string>]

        [{--verbose | -v}]

        [{--help | -h}]


Options:

    --host <string>

        IP address of the node to flush. Defaults is all nodes.


  Display Options:

    --verbose | -v

        Display more detailed information.

    --help | -h

        Display help for this command.

However, it is not recommended to flush the cache as a part of normal cluster operation. Refresh will walk the file and update the cache as needed.

Another area of caution is applying a netgroup with unresolved hostname(s). This will also slow down resolution of the hosts in the file when a refresh or startup of node happens. The best practice is to ensure that each host in the netgroups file is resolvable in DNS, or to just use IP addresses rather than names in the netgroup.

When it come to switching to a netgroup for clients already on an export, a netgroup can be added and clients removed in one step (#1 –add-client netgroup –remove-clients 1,2,3,etc). The cluster allows a mix of netgroup and host entries, so duplicates are tolerated. However, it’s worth noting that if there are unresolvable hosts in both areas, the startup resolution time will take that much longer.

OneFS & Files Per Directory

Had several recent enquiries from the field recently asking about the low impact methods to count the number of files in large directories containing hundreds of thousands to millions of files).

Unfortunately, there’s no ‘silver bullet’ command or data source available that will provide that count instantaneously: Something will have to perform a treewalk to gather these stats.  That said, there are a couple of approaches to this, each with its pros and cons:

  • If the customer has a SmartQuotas license, they can configure an advisory directory quota on the directories they want to check. As mentioned, the first job run will require working the directory tree, but they can get fast, low impact reports moving forward.
  • Another approach is using traditional UNIX commands, either from the OneFS CLI or, less desirably, from a UNIX client. The two following commands will both take time to run: “
# ls -f /path/to/directory | wc –l
# find /path/to/directory -type f | wc -l

It’s worth noting that when counting files with ls, you’ll probably get faster results by omitting the ‘-l’ flag and using ‘-f’ flag instead. This is because ‘-l’ resolves UID & GIDs to display users/groups, which creates more work thereby slowing the listing. In contrast,  ‘-f’ allows the ‘ls’ command to avoid sorting the output. This should be faster, and reduce memory consumption when listing extremely large numbers of files.

Ultimately, there really is no quick way to walk a file system and count the files – especially since both ls and find are single threaded commands.  Running either of these in the background with output redirected to a file is probably the best approach.

Depending on your arguments for the ls or find command, you can gather a comprehensive set of context info and metadata on a single pass.

# find /path/to/scan -ls > output.file

It will take quite a while for the command to complete, but once you have the output stashed in a file you can pull all sorts of useful data from it.

Assuming a latency of 10ms per file it would take 33 minutes for 200,000 files. While this estimate may be conservative, there are typically multiple protocol ops that need to be done to each file, and they do add up. Plus, as mentioned before, ‘ls’ is a single threaded command.

  • If possible, ensure the directories of interest are stored on a file pool that has at least one of the metadata mirrors on SSD (metadata-read).
  • Windows Explorer can also enumerate the files in a directory tree surprisingly quickly. All you get is a file count, but it can work pretty well.
  • If the directory you wish to know the file count for just happens to be /ifs, you can run the LinCount job, which will tell you how many LINs there are in the file system.

Lincount (relatively) quickly scans the filesystem and returns the total count of LINs (logical inodes). The LIN count is essentially equivalent to the total file and directory count on a cluster. The job itself runs by default at the LOW priority, and is the fastest method of determining object count on OneFS, assuming no other job has run to completion.

The following syntax can be used to kick off the Lincount job from the OneFS CLI:

# isi job start lincount

The output from this will be along the lines of “Added job [52]”.

Note: The number in square brackets is the job ID.

To view results, run the following command from the CLI:

# isi job reports view [job ID]

For example:
# isi job reports view 52

LinCount[52] phase 1 (2021-07-06T09:33:33)

------------------------------------------

Elapsed time   1 seconds

Errors         0

Job mode       LinCount

LINs traversed 1722

SINs traversed 0

The "LINs traversed" metric indicates that 1722 files and directories were found.

Note: The Lincount job will also include snapshot revisions of LINs in its count.

Alternatively, if another treewalk job has run against the directory you wish to know the count for, you might be in luck.

At any rate, hundreds of thousands of files is a large number to store in one directory. To reduce the directory enumeration time, where possible divide the files up into multiple subdirectories.

When it comes to NFS, the behavior is going to partially depend on whether the client is doing READDIRPLUS operations vs READDIR. READDIRPLUS is useful if the client is going to need the metadata. However, ff all you’re trying to do is list the filenames, it actually makes that operation much slower.

If you only read the filenames in the directory, and you don’t attempt to stat any associated metadata, then this requires a relatively small amount of I/O to pull the names from the meta-tree, and should be fairly fast.

If this has already been done recently, some or all of the blocks are likely to already be in L2 cache. As such, a subsequent operation won’t need to read from hard disk and will be substantially faster.

NFS is more complicated regarding what it will and won’t cache on the client side, particularly with the attribute cache and the timeouts that are associated with it.

Here are some options from fastest to slowest:

  • If NFS is using READDIR, as opposed to READDIRPLUS, and the ‘ls’ command is invoked with the appropriate arguments to prevent it polling metadata or sorting the output, execution will be relatively swift.
  • If ‘ls’ polls the metadata (or if NFS uses READDIRPLUS) but doesn’t sort the results, output will be fairly immediately, but will take longer to complete overall.
  • If ‘ls’ sorts the output, nothing will be displayed until ls has read everything and sorted it, then you’ll get the output in a deluge at the end.

OneFS MCP

Affectionately named after TRON’s  ‘Master Control Program’, MCP is OneFS’ main utility for distributed service control across a cluster. MCP is responsible for starting, monitoring, and restarting failed services on a cluster. It also monitors configuration files and acts upon configuration changes, propagating local file changes to the rest of the cluster. As such, it performs a similar function to the Windows ‘service control manager’ (SCM) or MacOS ‘launchd’.

MCP is actually comprised of three different processes, one for each of its modes:

  • Master
  • Failsafe
  • Forker

These can be seen when viewing the running processes on a healthy node:

# ps -auxw | grep -i mcp | grep -v grep

root    5400    0.4  0.0  60760  19928  -  Ss   11Jun21    170:08.18 isi_mcp: master (isi_mcp)

root    5179    0.0  0.0  32760  13632  -  Is   11Jun21      0:00.01 isi_mcp: failsafe (isi_mcp)

root    5181    0.0  0.0  31476  12572  -  Is   11Jun21      0:00.36 isi_mcp: forker (isi_mcp)

The ‘Master’ is the central MCP process and does the bulk of the work. It monitors files and services, including the failsafe process, and delegates actions to the forker process.

The role of the ‘Forker’ is to receive command-line actions from the master, execute them, and return the resulting exit codes. It receives actions from the master process over a UNIX domain socket. If the forker is inadvertently or intentionally killed, it’s automatically restarted by the master process. If necessary, MCP will continue trying to restart the forker at an increasing interval. If, after around ten minutes of unsuccessfully attempting to restart the forker, MCP will fire off a CELOG alert, and continue trying. A second alert would then be sent after thirty minutes.

The ‘Failsafe’ process is responsible for starting, monitoring, restarting, and stopping both the Master and Forker. It’s a single threaded process that, if killed, will shut down all three MCP services. If this occurs, the three services will stay down until they are restarted with the ‘isi_mcp’ CLI command. If the master fails and can’t be restarted, MCP will continue attempting to restart it and fire alerts in the same manner as described above for the forker service.

MCP monitors the following files:

File Type Function
/etc/mcp/sys/files/* Configuration files monitored by MCP.
/etc/mcp/sys/services/* Services that MCP starts and monitors.
/etc/ifs/array.xml Cluster configuration file.
/etc/mcp/override/* All files in override directory propagated to all nodes and entered in global mlist.
/etc/mcp/mlist.xml Local mlist (mlists are used to manage and track the above files)
/ifs/.ifsvar/etc/mcp/mlist.xml Master mlist

The following command will list the open files that MCP is currently monitoring on a node:

# for i in `sysctl efs.bam.busy_vnodes | grep -i mcp | awk '{print $4}' | sed -E 's/)//'`; do isi get -L $i | awk '{print $8}'; done

MCP monitors the configuration files in /etc/mcp/sys/files. While monitoring the configuration files MCP does two things:

  • Performs the file change action
  • Propagates config file changes to other nodes

Consider the XML configuration file for the ndmpd service, for example:

# cat /etc/mcp/sys/services/ndmpd

<?xml version="1.0"?>

<service name="ndmpd" enable="0" display="1" options="require-quorum,kill-on-sigquorum,require-post-ifs">

      <isi-meta-tag id="ndmp_service">

        <mod-attribs>enable</mod-attribs>

      </isi-meta-tag>

      <description>Network Data Management Protocol Daemon</description>

      <process name="isi_ndmp_d" pidfile="/var/run/isi_ndmp_d.pid"

               startaction="start" stopaction="stop"/>

      <actionlist name="start">

        <action>/usr/bin/isi_ndmp_d</action>

      </actionlist>

      <actionlist name="stop">

        <action>/usr/bin/killall isi_ndmp_d</action>

      </actionlist>

</service>

Much of what MCP does in response to an event notification is defined by the ‘actionlist’ in a config file. This is simply a list of commands to be executed, with action lists for starting and stopping services, and also for specific configuration files changes (for example, importing a product license).

Many of the local configuration files need to be uniform across the cluster so, unless the ‘notify =0’ flag is set, the master process also copies changed files to /ifs for MCP on other nodes to use.

MCP starts and watches already running services in accordance with their service description files, stored under /etc/mcp/sys/services. These are XML files which describe how a service is to be started when enabled or stopped when disabled.

The XML file also lists under ‘options’ the conditions of the node and/or cluster that must be met before the service can be started (for example above, ‘require-quorum’ or ‘require-post-ifs’, etc).

When a service is monitored, MCP ensures the correct state of the service on a node. If a service is marked ‘enable’, MCP will run the start action until the PID confirms it as running. When a service is marked ‘disable’, MCP will kill the service via its PID. The full list of services and their current state can be viewed with the following CLI command:

# isi services -a

MCP monitors services by observing their PID files (under /var/run), plus the process table itself, to determine if a process is already running or not. It compares this state against the ‘enabled/disabled’ state for the service and determines whether any start or stop actions are required. Services may also be configured to terminate if the cluster loses quorum with the option ‘kill-on-sigquorum’ in their XML file.

Another type of configuration file that MCP monitors is also known as a service override file, which live under /etc/mcp/override. These override files are used to store any current settings for options which have been changed from the defaults. The override files are always shared across the cluster via MCP’s configuration propagation mechanism.

The Master MCP process creates merged lists, or mlists, that are used to track and coordinate the process of managing the XML config and service description files. There are two types of mlist: Local and Master. The master process will automatically create the local mlist at startup if it doesn’t already exist. However, the master mlist is created later since MCP starts and begins operations before /ifs is mounted.

Here’s the mlist entry for the cluster’s NTP service, for example:

    <file>

      <path>/etc/mcp/templates/ntp.conf</path>

      <md5>7772b5d50494c85043933321c21dbb8d</md5>

      <timestamp>1623466667</timestamp>

      <revision>1</revision>

      <array_id>1</array_id>

    </file>

The local mlist has an entry for every file identified in the MCP file configuration files (/etc/mcp/sys/files), an entry for every configuration file (/etc/mcp/sys/files & procs), an entry for an override file for each service (may or may not exist), an entry for /etc/ifs/array.xml. It also contains an entry for the master mlist (/ifs/.ifsvar/etc/mcp/mlist.xml).

# grep mlist.xml mlist.xml

      <path>/ifs/.ifsvar/etc/mcp/mlist.xml</path>

The mlist has an entry for every local file that’s shared across the cluster and the override service files. A coordinator lock file prevents different nodes from making changes to /ifs at the same time.

If MCP attempts to start a service and fails, as long as the service is enabled, it will wait for an interval before attempting to start the service again. This interval doubles in size each time, until it reaches 256 seconds then remains at this frequency.