OneFS and the PowerScale PA110 Performance Accelerator

In addition to a variety of software features, OneFS 9.11 also introduces support for a new PowerScale performance accelerator node, based upon the venerable 1RU Dell PE R660 platform.

The diskless PA110 accelerator can simply, and cost effectively, augment the CPU, RAM, and bandwidth of a network or compute-bound cluster without significantly increasing its capacity or footprint.

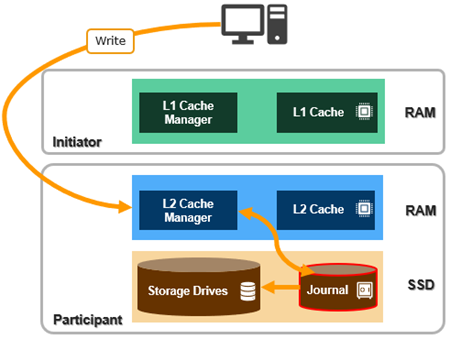
Since the accelerator node contains no storage and a sizable RAM footprint, it has a substantial L1 cache, since all the data is fetched from other storage nodes. Cache aging is based on a least recently used (LRU) eviction policy and the PA110 is available in a single memory configuration, with 512GB of DDR5 DRAM per node. The PA110 also supports both inline compression and deduplication.

In particular, the PA110 accelerator can provide significant benefit to serialized, read-heavy, streaming workloads by virtue of its substantial, low-churn L1 cache, helping to increase throughput and reduce latency. For example, a typical scenario for PA110 addition could be a small all-flash cluster supporting a video editing workflow that is looking for a performance and/or front-end connectivity enhancement, but no additional capacity.

Other than a low capacity M.2 SSD boot card, the PA110 node contains no local storage or journal. This new accelerator is fully compatible with clusters containing the current and previous generation PowerScale nodes. Also, unlike storage nodes which require the addition of a 3 or 4 node pool of similar nodes, a single PA110 can be added to a cluster. The PA110 can be added to a cluster containing all-flash, hybrid, and archive nodes.

Under the top cover, the one rack-unit PA110 enclosure contains dual Sapphire Rapids 6442Y CPUs with 24 core/48 thread-60MB L3, running at 2.6GHz. This is complemented by 512GB of DDR5 memory and dual 960GB M.2 mirrored boot media.

Networking comprises the venerable Mellanox CX6 series NICs, with options including CX6-LX Dual port 25G, CX6-DX Dual port 100G, or MLX CX6 VPI 200G Ethernet.

The PA110 also includes a LOM (Lan-On-Motherboard) port for management and a RIO/DB9 for the serial port. This is all powered by dual 1100W Titanium hot swappable power supplies.

The PowerScale PA110 also uses a new boot-optimized storage solution (BOSS) for its boot media. This comprises a BOSS module and associated card carrier. The module is housed in the chassis as shown:

The card carrier holds two M.2 NVMe SSD cards, which can be removed from the rear of the node as follows:

Note that, unlike PowerScale storage nodes, since the accelerator does not provide any /ifs filesystem storage capacity, the PowerScale PA110 node does not require OneFS feature licenses for any of the various data services running in a cluster.

The PowerScale PA110 can also be configured to order in ‘backup mode’, too. In this configuration, the accelerator also includes a pair of fibre channel ports, provided by an Emulex LPE35002 32Gb FC HBA. This enables direct, or two-way, NDMP backup from a cluster to a tape library or VTL, either directly attached or across a fibre channel fabric.

With a fibre channel card installed in slot 2, the PA110 backup accelerator integrates seamlessly with current DR infrastructure, as well as with leading data backup and recovery software technologies to satisfy the availability and recovery SLA requirements of a wide variety of workloads.

As a backup accelerator, the PA110 aids overall cluster performance by offloading NDMP backup traffic directly to the fibre channel ports and reducing CPU and memory consumption on storage nodes – thereby minimizing impact on front end workloads. This can be of particular benefit to clusters that have been using chassis-based nodes populated with fibre channel cards. In these cases, a simple, non-disruptive addition of PA110 backup accelerator node(s) frees up compute resources on the storage nodes, boosting client workload performance and shrinking NDMP backup windows.

The following table includes the hardware specs for the new PowerScale PA110 performance accelerator, as compared to its predecessors (P100 and B100), which are as follows:

Component (per node) PA110 (New( P100 (Prior gen) B100 (Prior gen)
OneFS release OneFS 9.11 or later OneFS 9.3 or later OneFS 9.3 or later
Chassis PowerEdge R660 PowerEdge R640 PowerEdge R640
CPU 24 cores (dual socket Intel 6442Y @ 2.6Ghz) 20 cores (dual socket Intel 4210R @ 2.4Ghz) 20 cores (dual socket Intel 4210R @ 2.4Ghz)
Memory 512GB DDR5 384GB or 768GB DDR4 384GB DDR4
Front-end I/O 2 x 10/25 Gb Ethernet; Or

2 x 40/100Gb Ethernet; Or

2 x HDR Infiniband (200Gb)

2 x 10/25 Gb Ethernet Or

2 x 40/100Gb Ethernet

2 x 10/25 Gb Ethernet Or

2 x 40/100Gb Ethernet

Back-end I/O 2 x 10/25 Gb Ethernet Or

2 x 40/100Gb Ethernet Or 2 x HDR Infiniband (200Gb)

Optional 2 x FC for NDMP

2 x 10/25 Gb Ethernet Or

2 x 40/100Gb Ethernet

Or 2 x QDR Infiniband

2 x 10/25 Gb Ethernet Or

2 x 40/100Gb Ethernet Or 2 x QDR Infiniband

Mgmt Port LAN on motherboard 4 x 1GbE (rNDC) 4 x 1GbE (rNDC)
Journal N/A N/A N/A
Boot media BOSS module 960GB 2x 960GB SAS SSD drives 2x 960GB SAS SSD drives
IDSDM 1 x 32GB microSD (Receipt and recovery boot image) 1x 32GB microSD (Receipt and recovery boot image) 1x32GB microSD (Receipt and recovery boot image)
Power Supply Dual redundant 1100W

100-240V, 50/60Hz

Dual redundant 750W 100-240V, 50/60Hz Dual redundant 750W 100-240V, 50/60Hz
Rack footprint 1RU 1RU 1RU
Cluster addition Minimum one node, and single node increments Minimum one node, and single node increments Minimum one node, and single node increments

These node hardware attributes can be easily viewed from the OneFS CLI via the ‘isi_hw_status’ command.

OneFS Migration from ESRS to Dell Connectivity Services

Tucked amongst the payload of the recent OneFS 9.11 release is new functionality that enables a seamless migration from EMC Secure Remote Services (ESRS) to Dell Technologies Connectivity Services (DTCS). DTCS, as you may recall from previous blog articles on the topic, is the rebranded SupportAssist solution for cluster phone-home connectivity.

First, why migrate from ESRS to DTCS? Well, two years ago, an end of service life date of January 2024 was announced for the Secure Remote Services version 3 gateway, which is used by the older ESRS, ConnectEMC, and Dial-home connectivity methods. Given this, the solution for clusters still using the SRSv3 gateway is to either:

  1. Upgrade Secure Remote Services v3 to Secure Connect Gateway v5.
  2. Upgrade to OneFS 9.5 or later and use the SupportAssist/DTCS ‘direct connect’ option.

The objective of this new OneFS 9.11 feature is to help customers migrate to DTCS so they can achieve their desired connectivity state with as little disruption as possible.

Scenario After upgrade to OneFS 9.11
Clusters with ESRS + SCGv5 Seamless migration capable
New cluster DTC is the only way for connectivity.

“isi esrs”, “Remote Support” in the WebUI will either be unavailable or hidden.

Clusters without ESRS/SupportAssist/DTC configured Same as above
Clusters with ESRS + SRSv3 Retain ESRS + SRSv3

HealCheck warning triggered

WebUI banner showed the migration did not happen

Resolution is to upgrade to SCGv5 or use direct connection

retry command is “isi connectivity provision start –retry-migration”


So when a cluster that has been provisioned with ESRS using a secure connect gateway is upgraded to OneFS 9.11, this feature automatically attempts to migrate to DTCS. Upon successful completion, any references to ESRS will no longer be visible.

Similarly, on new clusters running 9.1 1, the ability to provision with ESRS is removed, and messaging is displayed to encourage DTCS provisioning and enablement.

Under the hood, the automatic migration architecture comprises the following core functional components:

Component Description
Upgrade commit hook Starts the migration job.


Healthcheck connectivity_migration checklist A group of checks used to determine if automatic migration can proceed.


Provision state machine Updated to use the ESE API /upgradekey for provisioning in migration scenario.


Job Engine Job ·         Precheck: Runs the connectivity_migration checklist which must pass

·         Migrate settings: Configure DTCS using ESRS and Cluster identity settings

·         Provision: Enables DTCS, starts a provision task using state machine


There’s a new healthcheck checklist called ‘connectivity migration’, which contains a group of checks to determine whether its safe for an automatic migration to proceed.

There’s been an update to the provision state machine so that it now uses the upgrade key from the ESE API, so that we can provision in the migration scenario.

And the final piece is the migration job. Executed and managed by the Job Engine, this migration job has 3 phases.

The first, or pre-check, phase runs the connectivity migration checklist. All the checklist elements must to pass in order for the job to continue.

If the checklist fails, the results of those checks can be used to determine what remedial actions are needed in order to get the cluster to their desired connectivity state. When it does pass, the job progresses to the migration settings phase. Here, the required configuration data is extracted from ESRS and the cluster settings in order to configure DTCS. This includes items like the gateway host, customer contact info, telemetry settings, etc. Once the DTCS configuration data is in place, the job continues to its final phase, which spawns the actual provision task.

After enabling DTCS, the provisioning state machine uses the ESRS API key that was configured or paired with the configured gateway, which it uses and passes to the ESE API upgrade key, associate the key with the new ESE back end. Once that’s in place, DTCS provisioning via the upgrade hook background process.

A new CELOG alert has been added that will be triggered if DTCS provisioning fails during a seamless migration. This alert will automatically open a service request with a sev3 priority, and recommends contact Dell Support for assistance.

The connectivity CLI are minimal in OneFS 9.11, and essentially comprise providing messaging based on the state of the underlying system. The following example is from a freshly installed OneFS 9.11 cluster, where any ‘isi esrs’ CLI commands now display the following ‘no longer supported’ message:

# isi esrs view

Secure Remote Services (SRS) is no longer supported. Use Dell Technologies connectivity services instead via 'isi connectivity'.

A cluster that’s been upgraded to OneFS 9.11, but fails to automatically migrate to DTCS will display a message stating that SRS is at the end of its service life.

# isi esrs view

Warning: Secure Remote Service is at end of service life. Upgrade connectivity to Dell Technologies connectivity services now using ‘isi connectivity’ to prevent disruptions.  See https://www.dell.com/support/kbdoc/en-us/0000152189/powerscale-onefs-info-hubs cluster administration guides for more information.

There’s also a new ‘–retry-migration’ option for the ‘isi connectivity provision start’ command:

# isi connectivity provision start --retry-migration

SRS to Dell Technologies connectivity services migration started.

This can be used to rerun the migration process once any issues have been corrected, based on the results of the connectivity migration checklist.

Finally, upon successful migration, a message will inform that ESRS has been migrated to DTCS and that ESRS is no longer supported:

# isi esrs view

Secure Remote Services (SRS) connectivity has migrated to Dell Technologies connectivity services. Use ‘isi connectivity’ to manage connectivity as SRS is no longer supported.

Similarly, the WebUI updates will reflect the state of the underlying system. For example, on a freshly installed OneFS 9.11 cluster, the WebUI dashboard will remind the administrator that Dell Technologies Connectivity Services needs to be configured:

On the general settings page, the tab for ‘remote support’ has been removed in OneFS 9.11:

In the diagnostics gather when the checkbox comes up, the option for ESRS uploads has been removed and replaced with the DTCS upload:

And on a fresh OneFS 9.11 cluster, the remote support channel is no longer listed as an option for alerts:

If a migration does not complete successfully, a warning is displayed on the remote support tab on the general settings page informing that the migration has failed. This warning also provides information on how to proceed:

The WebUI messaging prompts the cluster admin to resolve the failed migration by examining the results of that checklist, and provides a path forward.

The alert is also displayed on the licensing tab, because at this point the connectivity needs to be reestablished because the migration failed:

The WebUI messaging provides steps to help resolve any migration issues. Plus, if a migration has failed, the ESRS upload will still remain present and active until DTCS is successfully provisioned:

Once successfully migrated, the WebUI dashboard will confirm this status:

The dashboard will also confirm that DTCS is now enabled and connected via the SCG:

Additionally, the ‘remote support’ tab and page are no longer visible under general settings, and the former ESRS option is replaced by the DTCS option on the gather menu:

When investigating and troubleshooting connectivity migration issues, if something goes wrong with the migration job, examining the /var/log/isi_ job_d.log file and search for ‘EsrsToDtcsMigration’ can be a useful starting point. For additional detail, increasing the verbosity to ‘debug logging’ for the isi_job_d service and retrying the migration can also be helpful.

Additionally, the ‘isi healthcheck evaluations’ command line options can be used to query the status of the connectivity_migration checklist, to help determine which of the checks has failed and needs attention:

# isi healthcheck evaluations list

# isi healthcheck evaluations view <name of latest>

Similarly, from the WebUI, navigating to Cluster management > Job operations displays the job status and errors. While Cluster Management > Healthcheck > Evaluations tab allows the connectivity_migration checklist details to be examined.

Note that ESRS to DTCS auto migration is only for clusters running ESRS that have been provisioned with  and are using the Secure Connect Gateway (SCG) option. Post successful migration,  the customer can always switch to using a direct connection rather than via SCG, if desired.

OneFS and Software Journal Mirroring – Management and Troubleshooting

Software journal mirroring (SJM) in OneFS 9.11 delivers critical file system support to meet the reliability requirements for PowerScale platforms with high capacity flash drives. By keeping a synchronized and consistent copy of the journal on another node, and automatically recovering the journal from it upon failure, enabling SJM can reduce the node failure rate by around three orders of magnitude – while also boosting storage efficiency by negating the need for a higher level of on-disk FEC protection.

SJM is enabled by default for the applicable platforms on new clusters. So for clusters including F710 or F910 nodes with large QLC drives that ship with 9.11 installed, SJM will be automatically activated.

SJM adds a mirroring scheme, which provides the redundancy for the journal’s contents.

This is where /ifs updates are sent to a node’s local, or primary, journal as usual. But they’re also synchronously replicated, or mirrored, to another node’s journal, too – referred to as the ‘buddy’.

Every node in an SJM-enabled pool is dynamically assigned a buddy node, and if a new SJM-capable node is added to the cluster, it’s automatically paired up with a buddy. These buddies are unique for every node in the cluster.

SJM’s automatic recovery scheme can use a buddy journal’s contents to re-form the primary node’s journal. And this recovery mechanism can also be applied manually if a journal device needs to be physically replaced.

The introduction of SJM changes the node recovery options slightly in OneFS 9.11. These options now include an additional method for restoring the journal:

This means that if a node within an SJM-enabled pool ends up at the ‘stop_boot’ prompt, before falling back to SmartFail, the available options in order of desirability are:

Order Options Description
1 Automatic journal recovery OneFS will first try to automatically recover from the local copy.


2 Automatic journal mirror recovery Automatic journal mirror recovery attempts to SyncBack from the buddy node’s journal.
3 Manual SJM recovery Dell support can attempt a manual SJM recovery, particularly in scenarios where a bug or issue in the software journal mirroring feature itself is inhibiting automatic recovery in some way.
4 SmartFail OneFS quarantines the node, places it into a read-only state, and reprotects by distributing the data to other devices.

While SJM is available upon upgrade commit to OneFS 9.11, it is not automatically activated. So any F710 or F910 SJM-capable node pools that were originally shipped with OneFS 9.10 installed  will require SJM to be manually enabled after their upgrade to 9.11.

If SJM is not activated on a cluster with capable node pools running OneFS 9.11, a CELOG alert will be raised, encouraging the customer to enable it. This CELOG alert will contain information about the administrative actions required to enable SJM. Additionally, a pre-upgrade check is also included in OneFS 9.11 to prevent any existing cluster with nodes containing 61TB drives that were shipped with OneFS 9.9 or older installed, from upgrading directly to 9.11 until the afflicted nodes have been USB-reimaged and their journals reformatted.

For SJM-capable clusters which do not have journal mirroring enabled, the CLI command (and platform API endpoint) to activate SJM operate at the nodepool level. Each SJM-capable pool will need to be enabled separately via the ‘isi storagepool nodepools modify’ CLI command, plus the pool name and the new  ‘–sjm-enable=true’ argument.

# isi storagepool nodepools modify <name> --sjm-enabled true

Note that this new syntax is only applicable only for nodepool(s) with SJM-capable nodes.

Similarly, to query the SJM status on a cluster’s nodepools:

# isi storagepool nodepools list –v | grep –e ‘SJM’ –e ‘Name:’

And to check a cluster’s nodes for SJM capabilities:

# isi storagepool nodetypes list -v | grep -e 'Product' -e 'Capable'

So there are a couple of considerations with SJM that should be borne in mind. As mentioned previously, any SJM-capable nodes that are upgraded from OneFS 9.10 will not have SJM enabled by default. So if, after upgrade to 9.11, a capable pool remains in an SJM-disabled state, a CELOG warning will be raised informing that the data may be under-protected, and hence it’s reliability lessened. And the CELOG event will include recommended corrective and remedial action. So administrative intervention will be required to enable SJM on this particular node pool, ideally, or alternatively increase the protection level to meet the same reliability goal.

So how impactful is SJM to protection overhead on an SJM-capable node pool/cluster? The following table shows the protection layout, both with and without SJM, for the F710 and F910 nodes containing 61TB drives:

Node type Drive Size Journal Mirroring +d2:1n +3d:1n1d +2n +3n
F710 61TB SDPM 3 4-6 7-34 35-252
F710 61TB SDPM SJM 4-16 17-252
F910 61TB SDPM 3 5-19 20-252
F910 61TB SDPM SJM 3-16 17-252

Taking the F710 with 61TB drives example above, without SJM +3n protection is required at 35 nodes and above. In contrast, with SJM-enabled, the +3d:1n1d protection level suffices all the way up to the current maximum cluster size of 252 nodes.

Generally, beyond enabling it on any capable-pools, after upgrading to 9.11 SJM just does its thing and does not require active administration or management. However, with a corresponding buddy journal for every primary node, there may be times when a primary and its buddy become un-synchronized. Clearly, this would mean that mirroring is not functioning correctly and a SyncBack recovery attempt would be unsuccessful. OneFS closely monitors this scenario, and will fire either of the top two CELOG event types below to alert the cluster admin in the event that journal syncing and/or mirroring are not working properly:

Possible causes for this could include the buddy remaining disconnected, or in a read-only state, for a protracted period of time. Or a software bug or issue, that’s preventing successful mirroring. This would result in a CELOG warning being raised for the buddy of the specific node, with the suggested administrative action included in the event contents.

Also, be aware that SJM-capable and non-SJM-capable nodes can be placed in the same nodepool if needed, but only if SJM is disabled on that pool – and the protection increased correspondingly.

The following chart illustrates the overall operational flow of SJM:

SJM is a core file system feature, so the bulk of its errors and status changes are written to the ubiquitous /var/log/messages file. However, since the Buddy assignment mechanism is a separate component with its own user-space demon, its notifications and errors are sent to a dedicated ‘isi_sjm_budassign_d’ log. This logfile is located at:

/var/log/isi_sjm_budassign_d.log

OneFS and Software Journal Mirroring – Architecture and Operation

In this next article in the OneFS software journal mirroring series, we will dig into SJM’s underpinnings and operation in a bit more depth.

With its debut in OneFS 9.11, the current focus of SJM is the all-flash F-series nodes containing either 61TB or 122TB QLC SSDs. In these cases, SJM dramatically improves the reliability of these dense drive platforms with journal fault tolerance. Specifically, it maintains a consistent copy of the primary node’s journal on a separate node. By automatically recovering the journal from this mirror, SJM is able to substantially reduce the node failure rate without the need for increased FEC protection overhead.

SJM is enabled by default for the applicable platforms on new clusters. So for clusters including F710 or F910 nodes with large QLC drives that ship with 9.11 installed, SJM will be automatically activated.

SJM adds a mirroring scheme, which provides the redundancy for the journal’s contents. This is where /ifs updates are sent to a node’s local, or primary, journal as usual. But they’re also synchronously replicated, or mirrored, to another node’s journal, too – referred to as the ‘buddy’.

Architecturally, SJM’s main components and associated lexicon are as follows:

Item Description
Primary Node with a journal that is co-located with the data drives that the journal will flush to.
Buddy Node with a journal that stores sufficient information about transactions on the primary to restore the contents of a primary node’s journal in the event of its failure.
Caller Calling function that executes a transaction. Analogous to the initiator in the 2PC protocol.
Userspace journal library Saves the backup, restores the backup, and dumps journal (primary and buddy).
Buddy reconfiguration system Enables buddy reconfiguration and stores the mapping in buddy map via buddy updater.
Buddy mapping updater Provides interfaces and protocol for updating buddy map.
Buddy map Stores buddy map (primary <-> buddy).
Journal recovery subsystem Facilitates journal recovery from buddy on primary journal loss.
Buddy map interface Kernel interface for buddy map.
Mirroring subsystem Mirrors global and local transactions.
JGN Journal Generation Number, to identify versions and verify if two copies of a primary journal are consistent.
JGN interface Journal Generation Number interface to update/read JGN.
NSB Node state block, which stores JGN.
SB Journal Superblock.
SyncForward Mechanism to sync an out-of-date buddy journal with missed primary journal content additions & deletions.
SyncBack Mechanism to reconstitute a blown primary journal from the mirrored information stored in the buddy journal.

These components are organized into the following hierarchy and flow, split across kernel and user space:

A node’s primary journal is co-located with the data drives that it will flush to. In contrast, the buddy journal lives on a remote node and stores sufficient information about transactions on the primary, to allow it to restore the contents of a primary node’s journal in the event of its failure.

SyncForward is the mechanism by which an out of date Buddy journal is caught up with any Primary journal transactions that it might have missed. While SyncBack, or restore, allows a blown Primary journal to be reconstituted from the mirroring information stored in its Buddy journal.

SJM needs to be able to rapidly detect a number of failure scenarios and decide which is the appropriate recovery workflow to initiate. For example, a blown primary journal, where SJM must quickly determine whether the Buddy’s contents are complete, to allow a SyncBack to fully reconstruct a valid Primary journal. Versus whether to resort to a more costly node rebuild instead. Or, if the Buddy node disconnects briefly, which of a Primary journal’s changes should be replicated during a SyncForward, in order to bring the Buddy efficiently back into alignment.

SJM tags the transactions logged into the Primary journal, and their corresponding mirrors in the Buddy, with a monotonically increasing Journal Generation Number, or JGN.

The JGN represents the most recent & consistent copy of a primary node’s journal, and it’s incremented whenever the write status of the Buddy journal changes, which is tracked by the Primary via OneFS GMP group change updates.

In order to determine whether the Buddy journal’s contents are complete, the JGN needs to be available to the primary node when its primary journal is blown. So the JGN is stored in a Node State Block, or NSB, and saved on a quorum of the node’s data-drives. Therefore, upon loss of a Primary journal, the JGN in the node state block can be compared against the JGN in the Buddy to confirm its transaction mirroring is complete, before the SyncBack workflow is initiated.

A primary transaction exists on the node where data storage is being modified, and the corresponding buddy transaction is a hot, redundant duplicate of the primary information on a separate node. The SDPM journal storage on the F-series platforms  is fast, and the pipe between nodes across the backend network is optimized for low-latency bulk data flow. And this allows the standard POSIX file model to transparently operate on the front-end protocols, which are blissfully aware of any journal jockeying that’s occurring behind the scenes.

The journal mirroring activity is continuous, and if the Primary loses contact with its Buddy, it will urgently seek out another Buddy and repeat the mirroring for each active transaction, to regain a fully mirrored journal config. If the reverse happens, and the Primary vanishes due to an adverse event like a local power loss or an unexpected reboot, the primary can reattach to its designated buddy and ensure that its own journal is consistent with the transactions that the Buddy has kept safely mirrored. This means that the buddy must reside on a different node than the primary. As such, it’s normal and expected for each primary node to also be operating as the buddy for a different node.

The prerequisite platform requirements for SJM support in 9.11, which are referred to as ‘SJM-capable nodes, are as follows:

Essentially, this is any F710 and F910’s with 61TB or 122TB SSDs which shipped with OneFS 9.10 or later are considered SJM-capable.

Note that there are a small number of F710 and F910s with 61TB drives out there which were shipped with OneFS 9.9 or earlier installed. These nodes must be re-imaged before they can use SJM. So they first need to be SmartFailed out, then USB reimaged to OneFS 9.10 or later. This is to allow the node’s SDPM journal device to be reformatted to include a second partition for the 16 GiB buddy journal allocation. However, this 16 GiB of space reserved for the buddy journal will not be used when SJM is disabled. The following table shows the maximum SDPM usage per journal type based on SJM enablement:

Journal State Primary journal Buddy journal
SJM enabled 16 GiB 16 GiB
SJM disabled 16 GiB 0 GiB

But to reiterate, the SJM-capable platforms which will ship with OneFS 9.11 installed, or those that shipped with OneFS 9.10, are ready to run SJM, and will form node pools of equivalent type.

While SJM is available upon upgrade commit to OneFS 9.11, it is not automatically activated. So for any F710 or F910 nodes with large QLC drives that were originally shipped with OneFS 9.10 installed, the cluster admin will need to manually enable SJM on any capable pools after their upgrade to 9.11.

Plus, if SJM is not activated, a CELOG alert will be raised, encouraging the customer to enable it, in order for the cluster to meet the reliability requirements. This CELOG alert will contain information about the administrative actions required to enable SJM.

Additionally, a pre-upgrade check is also included in OneFS 9.11 to prevent any existing cluster with nodes containing 61TB drives that were shipped with OneFS 9.9 or older installed, from upgrading directly to 9.11 – until these nodes have been USB-reimaged and their journals reformatted.

OneFS and Software Journal Mirroring

OneFS 9.11 sees the addition of a Software journal mirroring capability, which adds critical file system support to meet the reliability requirements for platforms with high capacity drives.

But first, a quick journal refresher… OneFS uses journaling to ensure consistency across both disks locally within a node and disks across nodes. As such, the journal is among the most critical components of a PowerScale node. When OneFS writes to a drive, the data goes straight to the journal, allowing for a fast reply.

Block writes go to the journal first, and a transaction must be marked as ‘committed’ in the journal before a ‘success’ status is returned to the file system operation.

Once a transaction is committed the change is guaranteed to be stable. If the node crashes or loses power, changes can still be applied from the journal at mount time via a ‘replay’ process. The journal uses a battery-backed persistent storage medium in order to be available after a catastrophic node event, and must also be:

Journal Performance Characteristic Description
High throughput All blocks (and therefore all data) pass through the journal, so it must never become a bottleneck.
Low latency Since transaction state changes are often in the latency path multiple times for a single operation, particularly for distributed transactions.

The OneFS journal mostly operates at the physical level, storing changes to physical blocks on the local node. This is necessary because all initiators in OneFS have a physical view of the file system – and therefore issue physical read and write requests to remote nodes. The OneFS journal supports both 512byte and 8KiB block sizes of 512 bytes for storing written inodes and blocks respectively.

By design, the contents of a node’s journal are only needed in a catastrophe, such as when memory state is lost. For fast access during normal operation, the journal is mirrored in RAM. Thus, any reads come from RAM and the physical journal itself is write-only in normal operation. The journal contents are read at mount time for replay. In addition to providing fast stable writes, the journal also improves performance by serving as a write-back cache for disks. When a transaction is committed, the blocks are not immediately written to disk. Instead, it is delayed until the space is needed. This allows the I/O scheduler to perform write optimizations such as reordering and clustering blocks. This also allows some writes to be elided when another write to the same block occurs quickly, or the write is otherwise unnecessary, such as when the block is freed.

So the OneFS journal provides the initial stable storage for all writes and does not release a block until it is guaranteed to be stable on a drive. This process involves multiple steps and spans both the file system and operating system. The high-level flow is as follows:

Step Operation Description
1 Transaction prep A block is written on a transaction, for example a write_block message is received by a node. An asynchronous write is started to the journal. The transaction preparation step will wait until all writes on the transaction complete.
2 Journal delayed write The transaction is committed. Now the journal issues a delayed write. This simply marks the buffer as dirty.
3 Buffer monitoring A daemon monitors the number of dirty buffers and issues the write to the drive upon reach its threshold.
4 Write completion notification The journal receives an upcall indicating that the write is complete.
5 Threshold reached Once journal space runs low or an idle timeout expires, the journal issues a cache flush to the drive to ensure the write is stable.
6 Flush to disk When cache flush completes, all writes completed before the cache flush are known stable. The journal frees the space.

The PowerScale F-series platforms use Dell’s VOSS M.2 SSD drive as the non-volatile device for their software-defined persistent memory (SDPM) journal vault.  The SDPM itself comprises two main elements:

Component Description
BBU The BBU pack (battery backup unit) supplies temporary power to the CPUs and memory allowing them to perform a backup in the event of a power loss.
Vault A 32GB M.2 NVMe to which the system memory is vaulted.

While the BBU is self-contained, the M.2 NVMe vault is housed within a VOSS module, and both components are easily replaced if necessary.

The current focus of software journal mirroring (SJM) are the all-flash F710 and F910 nodes that contain either the 61 TB QLC SSDs, or the soon to be available 122TB drives. In these cases, SJM dramatically improves the reliability of these dense drive platforms. But first, some context regarding journal failure and it’s relation to node rebuild times, durability, and the protection overhead.

Typically, a node needs to be rebuilt when its journal fails, for example if it loses its data, or if the journal device develops a fault and needs to be replaced. To accomplish this, the OneFS SmartFail operation has historically been the tool of choice, to restripe the data away from the node. But the time to completion for this operation depends on the restripe rate and amount of the storage. And the gist is that the denser the drives, the more storage is on the node, and the more work SmartFail has to perform.

And if restriping takes longer, the window during which the data is under-protected also increases. This directly affects reliability, by reducing the mean time to data loss, or MTTDL. PowerScale has an MTTDL target of 5,000 years for any given size of a cluster. The 61TB QLC SSDs represent an inflection point for OneFS restriping, where, due to their lengthy rebuild times, reliability, and specifically MTTDL, become significantly impacted.

So the options in a nutshell for these dense drive nodes, are either to:

  1. Increase the protection overhead, or:
  2. Improve a node’s resilience and, by virtue, reduce its failure rate.

Increasing the protection level is clearly undesirable, because the additional overhead reduces usable capacity and hence the storage efficiency – thereby increasing the per-terabyte cost, as well as reducing rack density and energy efficiency.

Which leaves option 2: Reducing the node failure rate itself, which the new SJM functionality in 9.11 achieves by adding journal redundancy.

So, by keeping a synchronized and consistent copy of the journal on another node, and automatically recovering the journal from it upon failure, enabling SJM can reduce the node failure rate by around three orders of magnitude – while removing the need for a punitively high protection level on platforms with large-capacity drives.

SJM is enabled by default for the applicable platforms on new clusters. So for clusters including F710 or F910 nodes with large QLC drives that ship with 9.11 installed, SJM will be automatically activated.

SJM adds a mirroring scheme, which provides the redundancy for the journal’s contents. This is where /ifs updates are sent to a node’s local, or primary, journal as usual. But they’re also synchronously replicated, or mirrored, to another node’s journal, too – referred to as the ‘buddy’.

This is somewhat analogous to how the PowerScale H and A-series chassis-based node paring operates, albeit in software and over the backend network this time, and with no fixed buddy assignment, rather than over a dedicated PCIe non-transparent bridge link to a dedicated partner node, as in the case of the chassis-based platforms.

Every node in an SJM-enabled pool is dynamically assigned a buddy node. And similarly, if a new SJM-capable node is added to the cluster, it’s automatically paired up with a buddy. These buddies are unique for every node in the cluster.

SJM’s automatic recovery scheme can use a buddy journal’s contents to re-form the primary node’s journal. And this recovery mechanism can also be applied manually if a journal device needs to be physically replaced.

A node’s primary journal lives within that node, next to its storage drives. In contrast, the buddy journal lives on a remote node and stores sufficient information about transactions on the primary, to allow it to restore the contents of a primary node’s journal in the event of its failure.

SyncForward is the process that enables a stale Buddy journal to reconcile with the Primary and any transactions that it might have missed. Whereas SyncBack, or restore, allows a blown Primary journal to be reconstructed from the mirroring information stored in its Buddy journal.

The next blog article in this series will dig into SJM’s architecture and management in a bit more depth.