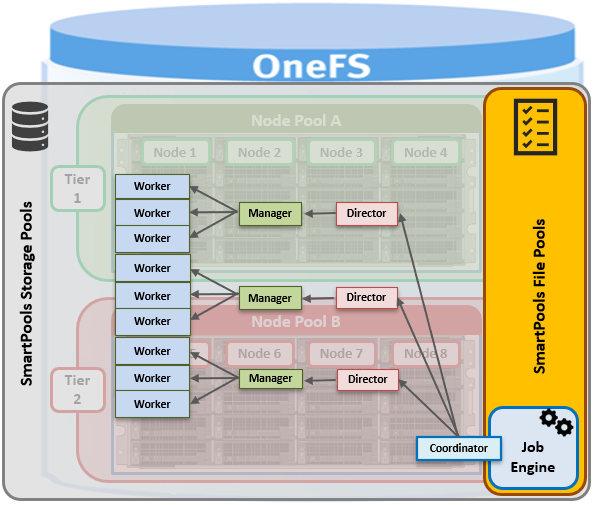
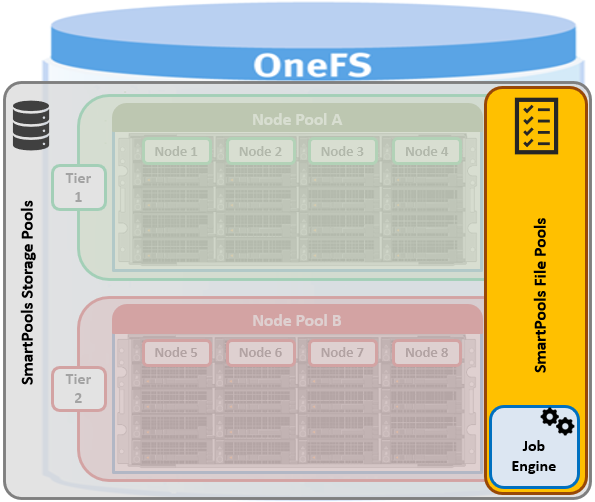
As we saw in the previous article in this series, SmartPools operation is quarterbacked and executed by the OneFS job engine.
When a one of the SmartPools job runs, all the files’ attributes are examined and checked against the list of file pool policies. As such, file pool policies are built on file attribute(s) the policy can match on, and these include file name, path, file type, size, timestamps, etc.

Once the file attribute is set to select the appropriate files, the action to be taken on those files can be added. For example, if the selected attribute is File Size, additional settings are available to dictate thresholds – for instance, all files bigger than 500MB, but smaller than 2GB. Next, actions are applied, such as move to node pool ‘x’, protect at level ‘y’, and lay out for access setting ‘z’.
| File Attribute |
Description |
| File Name |
Specifies file criteria based on the file name |
| Path |
Specifies file criteria based on where the file is stored |
| File Type |
Specifies file criteria based on the file-system object type |
| File Size |
Specifies file criteria based on the file size |
| Modified Time |
Specifies file criteria based on when the file was last modified |
| Create Time |
Specifies file criteria based on when the file was created |
| Metadata Change Time |
Specifies file criteria based on when the file metadata was last modified |
| Access Time |
Specifies file criteria based on when the file was last accessed |
| User Attributes |
Specifies file criteria based on custom attributes – see below |
Path-based file pool policies can direct data to the correct node pool on write, without a SmartPools job running. However, policies that use other attributes beside path to dictate placement, move their matching data when the next SmartPools job runs. This ensures that write performance is not sacrificed for initial data placement. Data not covered by a file pool policy is targeted to the default tier, which can be configured as desired. Note that CloudPools, the OneFS off-cluster cloud tiering service, also uses the file pool policy engine.
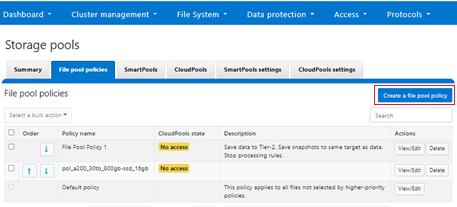
File pool policies can be configured from the CLI using the ‘isi filepools create’ command, or via the WebUI by navigating to File System > Storage Pools > File Pool Policies > Create a file pool policy:
When a file pool policy is created, SmartPools stores it in a configuration database with any other file policies. When a SmartPools job runs, it applies all the policies in order. If a file matches multiple policies, SmartPools will only apply the first rule it matches. So, for example if there is a rule that moves all small jpeg files to an A-series archive pool, and another that moves all files under 1 MB to an F-series performance tier, if the jpeg rule appears first in the list, then jpg files under 2 MB will go to archive, NOT the performance tier.
Criteria can be combined within a single policy using ‘And’ or ‘Or’ operators, so that data can be classified very granularly. Continuing with our example, if the desired behavior is to have all jpg files over 2 MB to be moved to the Archive node pool, the file pool policy can be simply constructed with an ‘And’ operator to explicitly cover that condition.
While the example above is a simple one, if needed, SmartPools can currently support up to 128 file pool policies, each of which can contain up to 3 file matching criteria or rules. However, as the list of file pool policies grows large, it becomes less practical to manually traverse them to see how a file will behave when policies are applied.
File pool policy order, and policies themselves, can be easily changed at any time. Specifically, policies can be added deleted, edited, copied and re-ordered. For example:
# isi filepool policies modify Archive_1 --description "Move older files to archive storage" --data-storage-target Archive_1 --data-ssd-strategy metadata --begin-filter --file-type=file --and --birth-time=2022-10-01 --operator=lt --and --accessed-time=2022-11-01 --operator=lt --end-filter
The file pool policy is applied when the next scheduled SmartPools job runs. By default, the SmartPools job runs once a day, but can also started manually:
# isi job jobs start SmartPools
File pool policies are evaluated in descending order, according to their position in the file pool policies list. By default, when a new policy is created, it is inserted immediately above the default file pool policy. The default policy is always the last in priority, and applies to all files that are not matched by any other file pool policy. The priority order of a file pool policy can be altered by moving it up or down in the list. For example:
# isi filepool policies list

Name        Description                               CloudPools State

----------------------------------------------------------------

Archive_1   Move older files to archive storage       No access

Perf_1      Move recent files to perf tier            No access

----------------------------------------------------------------

Total: 2

# isi filepool policies modify Perf_1 --apply-order 1

# isi filepool policies list

Name        Description                               CloudPools State

----------------------------------------------------------------

Perf_1      Move recent files to perf tier            No access

Archive_1   Move older files to archive storage       No access

----------------------------------------------------------------

Total: 2
In this case, the ‘Perf_1’ policy has been promoted to the top of the list, above the ‘Archive_1’ policy.
If no File Pool policy matches a file, the default policy specifies all storage settings for the file. The default policy, in effect, matches all files not matched by any other SmartPools policy. For this reason, the default policy is the last in the file pool policy list, and, as such, always the last policy that SmartPools applies.
Additionally, a file pool policy can be configured to match a user-specified ‘custom attribute’ and/or value.
When data is written to the cluster, SmartPools writes it to a single Node Pool only. This means that, in almost all cases, a file exists in its entirety within a Node Pool, and not across Node Pools. SmartPools determines which pool to write to as follows:
- If a file matches a file pool policy based on directory path, that file will be written into the Node Pool dictated by the File Pool policy immediately.
- If a file matches a file pool policy which is based on any other criteria besides path name, SmartPools will write that file to the Node Pool with the most available capacity.
The OneFS ‘isi get –D’ CLI command, or WebUI File System Explorer, provides a detailed view of where SmartPools-managed data is at any time by both the actual Node Pool location and the File Pool policy-dictated location (i.e. where that file will move after the next successful completion of the SmartPools job). More specifically, the selection of a disk pool target from a file pool policy typically follows the following logic path:
- If SmartPools is licensed and the policy’s pool ID is found that disk pool is targeted.
- If SmartPools is unlicensed, the policy ID specified for a file is ignored and the ‘any disk pool’ group ID is used instead.
- If the policy ID is not found and global spillover is enabled for the cluster, the spillover target is used as the policy. If global spillover is disabled, the ‘any disk pool’ group is used as the policy.
- The pools in the policy which satisfy the SSD preference are presented in a weighted random order. This continues until a suitable pool is found or an error is returned.
- If no suitable pool is found, the SSD preference is changed to ‘fallback’ and step #3 is repeated. The ‘fallback’ value allows the use of any pool if the reserved ‘system’ policy is used, or the cluster is all-SSD. Otherwise only all-HDD pools are used.
- If no suitable pool is found and global spillover is enabled for the cluster, the spillover target is used as the policy and step #3 is repeated (the SSD preference remains as ‘fallback’).
- If spillover is disabled and no suitable pool is found, processing stop and an error is returned.
After a file match with a File Pool policy occurs, the OneFS uses the settings in the matching policy to store and protect the file. However, a matching policy might not specify all settings for the match file. In this case, the default policy is used for those settings not specified in the custom policy. For each file stored on a cluster, the system needs to determine the following:
· Requested protection level
· Data storage target for local data cache
· SSD strategy for metadata and data
· Protection level for local data cache
· Configuration for snapshots
· SmartCache setting
· L3 cache setting
· Data access pattern
· CloudPools actions (if any)
A question that’s frequently asked is what happens to any files that are due to be tiered but are being actively used? SmartPools can move the files transparently, even if they’re open and being modified.
Under the hood, the locks OneFS uses to provide consistency inside the filesystem, are separate from the external file locks for consistency between applications. This allows OneFS to discreetly move metadata and data blocks around, while the file is locked by an application. The restriper also performs its work in small chunks to further minimize disruption.
In addition to actual file placement, SmartPools data access (DAC) settings can be configured at the file pool, or even the single file, level for the type of application or workflow. DAC allows data to be optimized for concurrent, streaming or random access, with each of these three options influencing how files are laid out on disk and cached. Specifically, the ‘random’ data access setting performs little to no read-cache prefetching, to avoid wasted disk seeks. This works best for small files under 128KB, and large files with random, small block accesses. Data is striped across the minimum number of drives needed to achieve the data protection settings.
Streaming access works well for sequentially-read, medium to large files. This access pattern uses aggressive prefetching to improve overall read throughput, and on disk layout spreads the file across a large number of drives to optimize access.
Concurrency, the default, is the middle ground option with moderate prefetching, and data striped across the minimum number of drives required to achieve the configured protection setting. Concurrency is useful for general workloads like file shares and home directories, and file sets with a mix of both random and sequential access.
All the current generation of PowerScale nodes contain some percentage of flash media, and these SSDs can be used to accelerate performance across the entire cluster, by using them for caching or storage. As such, OneFS offers several SSD Strategies, including:
| SSD Strategy |
Description |
| Metadata read acceleration |
Creates a preferred mirror of file metadata on SSD, and writes the rest of the metadata, plus all the actual file data, to HDD. |
| Metadata read & write acceleration |
All the metadata mirrors are stored on SSD. |
| Avoid SSDs |
Writes all associated file data and metadata to HDDs. Only really used when there is insufficient SSD storage capacity, to prioritize its utilization. |
| Data on SSDs |
All of a node pool’s data and metadata resides on flash. |
| L3 cache |
All of a node pool’s SSDs are used for SmartFlash read caching. |
When L3 caching is enabled, it consumes all the SSD capacity in a node pool and therefore cannot coexist with other SSD strategies.
In contrast to L3 cache, with the data on SSD strategy, only the files specifically targeted to SSD benefit from the increased read and write performance. The remainder of the data on the node pool lives exclusively on hard disk and will not benefit from SSD.
The ‘isi_cache_stats -v’ CLI command will return the ratio of L3 cache hits to cache misses. A value of 70% or more cache hits indicates that L3 is working pretty well. Whereas less than 70% suggests that the SSDs may be better used for a metadata strategy.
However, be aware that SmartPools SSD strategies in general typically require more complex configuration than L3 and must be monitored so as not to exceed the available SSD capacity.
In summary, as far as good practices for optimal cluster performance, consider the following when deploying and configuring SmartPools:
- Define a performance and protection profile, or SLA, for each tier, and configure it accordingly.
- Avoid creating tiers that combine node pools with differing performance profiles (ie. with and without SSDs).
- Ensure that cluster capacity utilization, for both hard drives and SSDs, remains below 90%.
- Keep Virtual Hot Spares enabled, with a minimum of 10% space allocation.
- Avoid creating hardlinks to files which will cause the file to match different file pool policies
- If node pools are combined into tiers, craft file pool rules to target the tiers rather than individual node pools within the tiers.
- Determine if metadata operations for a particular workload are biased towards reads, writes, or an even mix, and select the optimal SmartPools metadata or L3 caching strategy.
- If attempting to configure ‘up-tiering’, ensure it does what you expect. SmartPools jobs are scheduled, so the promotion of a file from an archive to a performance tier will not be immediate upon its access or modification.
- When employing a deep archiving strategy, ensure that the performance pool is optimized for all directories and metadata and the archive tier just for cold files as they age. This can be configured by adding a ‘TYPE=FILE’ statement to the aging file pool policy rule(s) to only move files to the archive tier.
- If SmartPools takes more than a day to run, or the cluster is already running the FSAnalyze job, consider using the FilePolicy, and corresponding IndexUpdate job.
- When enabling and scheduling the FilePolicy job, continue running the SmartPools job at a reduced frequency. For example:
- IndexUpdate running every six hours (low impact and priority 5), FilePolicy running daily (low impact and priority 6), and the SmartPools job running on the first Sunday of each month ( low impact and priority 6).
- Use SmartPools for Painless Tech refresh with intra-cluster migrations of data to other node pools. Allowing data to drain from a node pool before decommissioning makes the SmartFail occur much faster.
And finally, a laudable mantra for SmartPools management could be “simplicity reigns”! Where possible, resist the temptation to create more tiers, policies, or rules (ie. complexity) than you actually need.

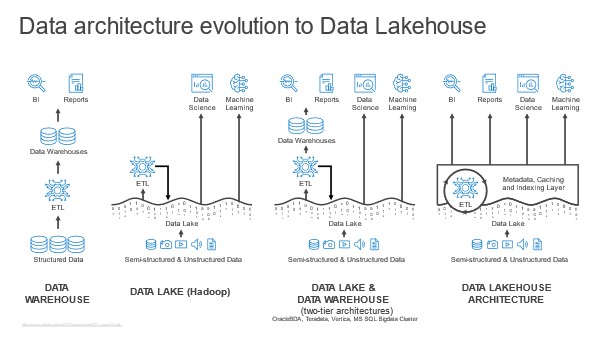
 Usually, the data lake is home to all an organization’s useful data. This data is already there. So, the data lakehouse begins with query against this data where it lives.
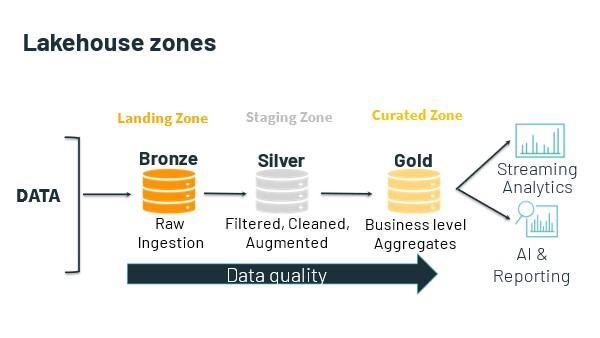